Are you a frustrated swimmer?
Do you find that you just can’t seem to get to grips with how to do it fluently and efficiently? Do you struggle to pick up any speed, get tired too quickly or show very little improvement?
Swimming isn’t just about physical strength. A lot of it has to do with technique, your bio-mechanics, and the psychology you bring into the water with you. In this article we’ll take you through some insightful tips to help you discover your swimming mojo.
Before We Get Started
Even though coaches and kenisiologists have masterfully figured out the best ways to swim faster, it’s important to still remember how much we don’t yet know about the body. And even further than that, you still don’t know how your specific body works relative to other individuals. Therefore, it’s important to put a lot of value to how you personally feel in the water. Through that, you can test out different instructions and figure out what works best for you.
David Blaine, a magician known to do crazy things with his body, such as hold his breath for 17 minutes, once pointed out that if we had no idea how human physiology worked, and someone gave us a modern-day textbook explaining it, we would’ve thought it was crazy.
Therefore, it’s important to listen to your body while trying to reach its fullest potential, because it’s the best way to unlock things about it that we may not know yet. Below, we’ve outlined some tricks that have generally worked for beginners trying to swim faster.
Get To Know The Swimming Strokes
To swim faster, you first have to make sure you understand the basic mechanics of every stroke.
Front Crawl
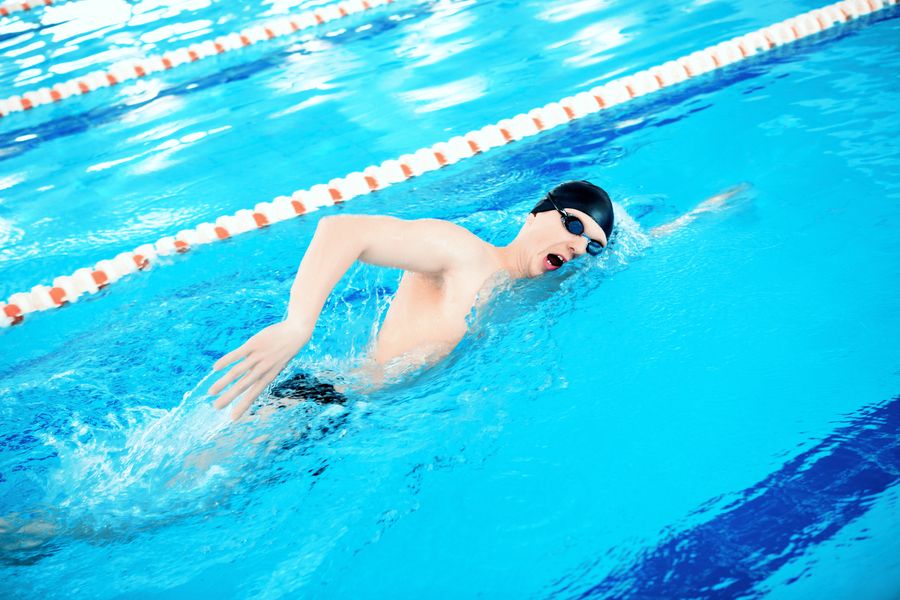
This stroke is known to be pretty ancient. There’s even an ancient Egyptian drawing dated 2000 BC that shows someone using it! It’s also the fastest and most commonly used of all four strokes. When a race is called “freestyle,” it’s often a no-brainer than all swimmers would choose to swim this stroke. Because of that, “front crawl” and “freestyle” are often used interchangeably.
The stroke is divided into four parts:
- Down-sweep
- In-sweep
- Up-sweep
- Recovery
Down-sweep is when you pull downwards after your hand hits the water, in-sweep is when you pull the water parallel to the rest of your body and up-sweep is when you move your hand upwards and out of the water near your thigh. Recovery is the period when your arm is in the air.
The legs are consistently flutter-kicking throughout all these phases, and people usually take a breath at least every 3 strokes.
Key Differences:
- The turning style in front crawl involves spinning under water and pushing off the wall with their feet (in backstroke as well)
Backstroke

Backstroke is a relatively new stroke and is the only one that is swum on the back. This is often an advantage for swimmers, because they’re able to breathe more freely, but a disadvantage because they also can’t see where they’re going.
One common trick is to reach the flags usually hung five meters before the end of the pool, count five strokes and you’re at the wall.
The stroke is divided into two parts:
- Power phase
- Recovery
During the power phase, one hand moves from the surface of the water in a semi-circle towards the side of the hip. The palm of the hand is always facing the opposite direction you’re going and your elbows are slightly bent and facing the bottom of the pool. The recovery is when your straightened arm comes up from the side of your hip and extends in a semi circles behind your head into the water.
When your hand comes up from the water, the thumb and index finger come up first, and when your hand goes into the water, your pinky finger goes in first and your palm is facing downwards.
The legs are also consistently flutter-kicking throughout all phases.
Key Differences:
- The start of this stroke involves grabbing part of the start block or the wall, keeping your knees up into your chest. You then kick upwards off the wall, bend your back with your arms straight and pointed over your head, heading down towards the water
- The turn also requires a flip –turn
Breaststroke
This stroke is by far the oldest stroke, dating all the way back to the Stone Age. There are Babylonian and Assyrian drawings that depict people using the breaststroke! Because this stroke requires swimmers to come out of the water often, it’s the slowest of all four strokes.
Never compare your breaststroke times to your front crawl times!
This breaststroke is divided into three parts:
- Out-sweep
- In-sweep
- Recovery
During the out-sweep, your hands are slightly tilted away from each other and moving outwards. The in-sweep is when you drag all that water down and into your chest/stomach, and recovery is when you lift your hands upwards and together out of the water and thrust it forward to glide.
The kick (called a “whip kick”) comes in two phases:
- In-sweep
- Thrust
During in-sweep, you drag your feet upwards, flattened and as far apart as they could be from each other while keeping your knees together. You then thrust your feet in a whip-like motion and bring them together and pointed for the glide.
The best time to thrust is during your arms’ recovery time.
Key Differences:
- The turning style involves touching the wall then kicking off of it
- The kick and arm strokes are not done simultaneously, but in sequence (similarly in butterfly). The sequence has to be well-synchronized otherwise it disrupts the momentum
Butterfly
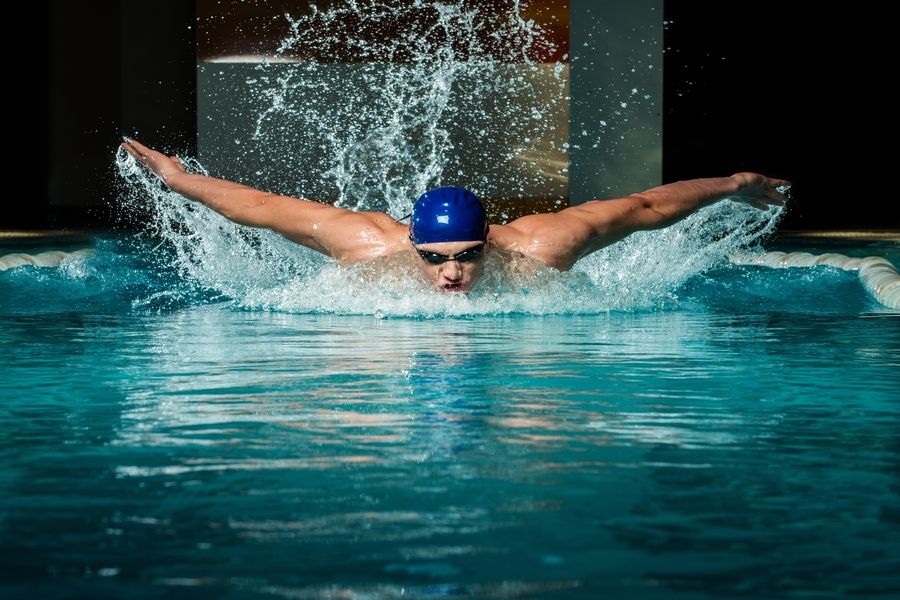
This is the newest stroke of them all, first created in the early 1900s as an evolution from the breaststroke. One swimming coach aimed to switch the recovery period in the breaststroke from underwater to outside of it. It resembled the movements of a butterfly, which is what gave it its name.
This made the stroke much faster, but it also requires a lot more muscle than all other strokes. This is also the most stroke that relies on technique in order to not completely lose momentum (particularly the conjunction between the kick and the arm strokes). Because of this, it’s often seen as the most difficult stroke of them all. To increase your muscle mass you can read our review of the testogen supplement which increases testosterone.
It’s divided into three main parts:
- The pull
- The push
- The recovery
The pull is similar to the breaststroke’s “out-sweep.” Your hands are in front of you, slightly underwater and slightly tilted away from each other as you pull outwards. During the push, you push the water inwards parallel to the rest of your body. During recovery, you lift your hands out of the water near the sides of your hips, and move your arms in a semi-circle outwards and straight in front of your head.
The butterfly kick is very different from the other strokes. The legs are straight and the feet are pointed downwards as you undulate your body from your shoulder downwards. Once the undulation reaches your knee, you then powerfully bend your knee, lifting your feet up and kicking them downwards (called a “dolphin kick”).
The dolphin kick is done twice, during the arms’ push phase, and during the recovery phase right before your hands hit the water.
After your arms’ recovery phase and your hands hit the water above your head, this moves the head downwards helping you start your undulation. The kick at the end of the undulation (in conjunction with the push) helps jolt your upper body out of the water.
It may be helpful to see this stroke as a combination of arm movement, kick and undulation. Both the arm movement and the dolphin kick push you upwards and forwards, but what connects both of those together is the undulation of your whole body. For the most momentum, your undulation has to perfectly synchronize your arm and leg movements together.
Key Differences:
- The turning style involves touching the wall then kicking off of it (like breaststroke)
- Dolphin kick and undulation
- Muscle power and synchrony between kick, undulation and pull are essential to momentum
Getting used to the water
One overlooked aspect in many beginners is that the body works very differently in an environment it’s not used to.
Your Muscles Are More Tense
One example as to how this happens is that your muscles get more tense than they need to be due to the anxiety of sinking/swallowing water etc.
This is why many people who don’t yet know how to float end up sinking. Their anxiety makes them unknowingly tense up their muscles, they don’t understand how the water works with their body, which makes them tense up even more, and they can’t seem to stay afloat.
But regardless of floating, even if you’re experienced and already know the basics of swimming, your body would still be a bit less relaxed in the water than it can be. We don’t yet know just how accustomed our bodies could get with the water, so feel free to find out.
Tips
- Try to practice swimming laps where you’re as relaxed as you can be
- Try to practice swimming laps without a specific stroke, but while you’re just fooling around in the water
- Try getting into positions that makes you uncomfortable and see how the water carries you
You Breathe More Than You Need To
Another way this happens is that we gasp for air way more than we have to. Most activities we do throughout our lives don’t require us to be submerged in something we can’t breathe through, so this can make us feel as though we need to breathe more than we actually do.
Sprint swimmers usually try to make sure they only breathe once or twice (if at all) every 50 meters, because reaching up for air would add to their time.
Tips
- Try to mindfully remind yourself while you’re swimming that you can manage without reaching up too often
- Exhale slowly into the water (don’t hold your breath)
- Try training how often you breathe through breathing exercises (e.g. laps where you take a breath every 3, 5 and 7 strokes)
- Stay consistent with how often you breathe in one lap (so it could start to feel automatic)
How Do I know I’ve Gotten Used To The Water?
A good way to test how much you’ve learned to trust the water is to see how much you freak out when something unexpected happens. For example, if you hit the lane, do you tense up and swim slower? If you accidentally swallow some water, do you panic and gasp for air? What if both of those happened right after each other?
If the way you adjust to unexpected instances is through the water and not by pausing or stopping entirely, then it can be safe to say you trust the mechanics of the water (and your body) enough to get you past it.
The Biomechanics
Once you’ve gotten used to the water, the next step is to make sure that your technique is in check. This would very much depend on your body type and what habits you’re used to. Here are some tips that can help with most people’s technique flaws:
1) Make Sure Your Body Position Is Straight
Because our lower body usually has more muscle mass than the rest of our body, many swimmers end up swimming with their feet below the surface of the water. This makes you less streamlined and you’ll be swimming slower than you could with the same effort.
If you generally have slim hips without much body fat, you’re most likely to be facing this problem. Body fat in that area would help keep your hips afloat and your body streamlined, without any extra effort to get your feet to float.
On average, women have a wider lower body frame and more body fat than men. This is why women generally hold higher records in marathon swimming. In sprint swimming, muscle strength usually outweighs this advantage.
Tips
“Swim Downwards”
One trick to get past this is to swim as though you’re trying to swim slightly downwards. This gets your body to tilt forward and your feet to float a bit more.
Flutter-Kick Faster
If you’re doing the front-crawl, try flutter-kicking faster. As you push downwards the water will be “pushing” your feet up and they’re going to float a bit more.
Also, make sure your toes are as pointed as possible. Flattened feet would make them sink faster.
Keep Your Head Down
You may be tempted to look forward so you could see the wall you’re swimming towards, but this actually forces your feet to sink. Keep your head down facing the bottom of the pool, and try using the tiles to figure out how close you are to the wall.
2) Maximize Your Distance Per Stroke
This basically means that you’d want to maximize the amount of water you’re pulling per stroke. That would also mean that the total number of strokes per lap will be just a few (depending on the type of stroke).
Part of this is just a matter of muscle strength. The more muscle you have, the more water you can drag. The other part is technique:
Tips
Slightly Cup Your Hands (With Small Gaps)
While dragging water, start with a straight-ish hand position, and then slightly bend it towards the end of the stroke. This will get you to drag more water. However, make sure not to cup it too much, as this would reduce the surface area of your hand.
For backstrokes, an S-shape is better.
Research has also surprisingly shown that having small gaps between your fingers increases the surface area of your hand and helps you drag more water.
Also, make sure you push the water “towards your stomach” and not downwards to the floor of the pool (or sea). Sometimes we forget that the water has to go along our body, not downwards.
Lengthen Your Strokes
After you recover (when your arm(s) is in the air), try to reach further forward before you pull again. This allows you to get more distance in while your arms are in the air, as opposed to dragging more water, which takes more effort.
Consistently stretching your lats to get them more flexible can help you reach further into the water without causing your hips to tilt too much.
Finish Your Stroke
Believe it or not, this is actually a common mistake while swimming (for most strokes). Sometimes our arms are tired and we forget to complete the stroke all the way till the sides of our hips, which puts a kink in your momentum. Finishing your stroke can also make your recovery more fluid.
3) Recognize How It All Fits Together

Lastly, it’s important to remember that your body is an interconnected machine, and all these small techniques to get you to swim faster have to work together fluidly, or it’s pretty pointless.
For example, sure, reaching further forward into the water is important, but what if it makes you roll your hips more (which ruins your pull efficiency and streamline)? Pulling with maximum strength in the beginning is good for your momentum, but what if it keeps you from finishing your strokes? Coming up for air fewer times does do better for your momentum, but what if it stresses you out and makes you tense up?
You have to analyze your techniques in terms of the bigger picture, and find the best way to mesh all these techniques together for a faster swim. The bigger picture you should always be striving for is consistent momentum and speed.
Tips
Pick When To Put In The Most Effort
That being said, you have to pick the best times to put in the most effort so that overall, you can travel the most distance with the least effort.
For example, kicking is very effortful, and sometimes throughout our lap, we can find ourselves occasionally kicking slower. Therefore, you might as well make sure to have a faster/more powerful kick when it matters, and less so when it doesn’t:
You should make sure you’re kicking fast, powerfully and consistently while:
- Taking a breath
- Your arms are in recovery (breaststroke, or butterfly)
The times when you need less of your kick is when there’s already something working on keeping your momentum going (e.g. your arms are pulling water). Therefore, if you ever feel like you want to rest your legs, the time to do it is when you already feel some other part of your body is taking care of your momentum.
This doesn’t apply to the butterfly stroke. The arm pull and the dolphin kick are done together, and the undulation is what keeps the momentum going.
This works the same the other way around; if you feel like resting your legs, make sure your arms pick up the pace.
Use Your “Glide” To Assess Your Momentum
“Gliding” is what we call the period after you give a forceful kick and your arm(s) is/are streamlined in front of you allowing you to glide across the water. This is the time when you mostly feel how fast your going.
You should start pulling water again just before you think you’re about to lose momentum. Pulling after you’ve lost momentum means that you would have to put in more effort to get it to pick up again. Pulling too early may lead you to putting too much effort for too little pay off in terms of speed.
Recap
Get To Know The Strokes
- Front Crawl
- Backstroke
- Breaststroke
- Butterfly
Get Used To The Water
- Muscles are more tense
- You breathe more
Biomechanics
- Make sure your body position is straight
- Recognize how it all fits together
- Maximize your distance between stroke